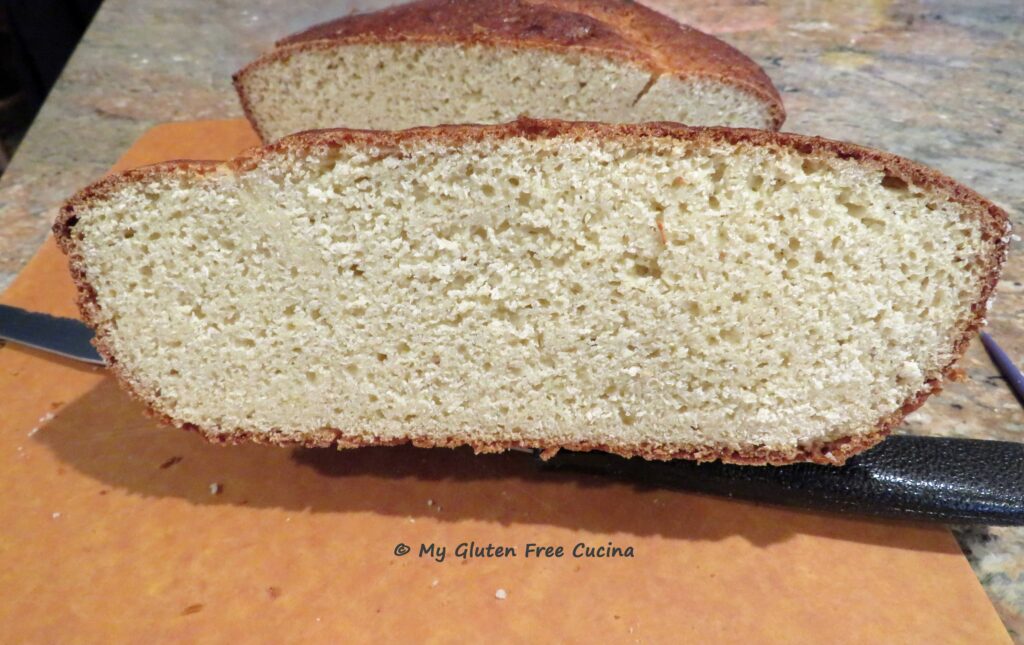
This Gluten Free Seeded Pumpernickel Bread is a little different than my usual. It has a hard, chewy crust and seeds that are baked right into the dough rather than sprinkled on top. Visual and textural interest aside, it’s delicious!
Rye flour is not gluten free, so as I thought about how to make a gluten free pumpernickel bread, the first consideration was of course, the flour substitution. I used my favorite gluten free flour blend (see below) and added just the tiniest amount of cocoa and molasses to give it that darker shade, reminiscent of whole grain bread.
The verdict – I was hooked after one bite!

About the flour
Where are my Better Batter fans? Have you ever tried mixing their Artisan Flour Blend and their Bread Flour together? I know I’m not the only one who does this. I used a 50/50 combination in this recipe and wow! once you try working with this dough you will see why it’s my favorite.
Remember to use my Promo Code MGFC30 for 30% off at checkout!


This post contains affiliate links.
Ingredients:
- 165 g. Better Batter Artisan Flour Blend
- 165 g. Better Batter Bread Flour
- 8 g. salt
- 2 g. cocoa powder
- 1 g. instant yeast (about 1/8 tsp.) *
- 25 g. pumpkin seeds
- 25 g. sunflower seeds
- 10 g. white sesame seeds
- 10 g. black sesame seeds
- 55 g. sourdough starter
- 280 g. warm water
- 15 g. cider vinegar
- 10 g. molasses
- 15 g. olive oil
Preparation:
You will need a fully active sourdough starter to make this bread. * If your starter is not quite there yet, then it is fine to add a tiny amount (1/8 tsp.) of commercial yeast to the dough to help it along. After experimenting with this recipe multiple times, I can attest that adding that little bit of commercial yeast will give this loaf the best rise and texture.
To make the dough, begin by adding the starter, vinegar, molasses, olive oil and water to the bowl of your stand mixer and whisk to combine. In a separate bowl, whisk together the flours, yeast, salt, cocoa powder and seeds.

You can use different seeds for this bread, for a total weight of 70g. I really like the way the black sesame seed stands out against the crumb.
 With the mixer on low speed, combine the wet and dry ingredients with the paddle attachment. Increase speed and beat for 3 more minutes to form a smooth dough.
 Use a spatula to scrape down the bowl. It will be stiff. Cover and let it rest at room temperature for 30 minutes.
 After 30 minutes, lightly flour a cutting board or countertop and turn the dough out. You will be surprised at how you can actually knead this dough with your hands. Pretty cool for gluten free dough! Turn the dough onto itself several times, rotating with each turn then pull it toward the center to create tension and shape it into a ball.
 Generously flour a 9″ round banneton and place the dough in the center. Cover and let it proof on the counter for 4 hours, then refrigerate overnight.
 In the morning, carefully invert the dough onto a sheet of parchment. Preheat the oven to 450º with a baking stone.
 Carefully brush off the excess flour and score the top of your loaf. I did a box score.
 Place the loaf in a baking dish, sheet pan or directly onto the baking stone. I baked my loaf in a clay baking bowl for the first 25 minutes then moved it directly onto the baking stone for another 40 minutes.
Reduce the heat to 425º, spray the sides of the oven with water and throw a few ice cubes onto the bottom tray. The steam will help with the rise and give your loaf and a nice crispy crust.
 The bread needs to reach an internal temperature of 210º, don’t guess- use a thermometer.
Allow the bread to cool fully on a rack, then store in a plastic bag at room temperature. While it cools, you can rotate the loaf every couple of hours, so that the moisture evaporates evenly (no gummy bottom!).
 I recommend waiting 24 hours before slicing, to be sure the crumb has set.
 This bread toasts up like a dream. The texture of the seeds and the crispy crust were outstanding. I wish you could hear the crunch! I have not had real pumpernickel bread since before my Celiac diagnosis, almost 9 years ago so this was a treat!
 If you don’t finish the loaf in a day or two, you’ll want to freeze it. I wrap the individual slices in plastic wrap and place them in a freezer bag.
 Notes ♪ This is a small loaf, perfect for a one or two-person household. It is as beautiful to look at as it is to eat! Toast it up for breakfast or use it for sandwiches, croutons or stuffing cubes.
Notes ♫ You can also bake this loaf in a Dutch oven. Bake covered for the first 40 minutes then remove the cover for 25 minutes longer.
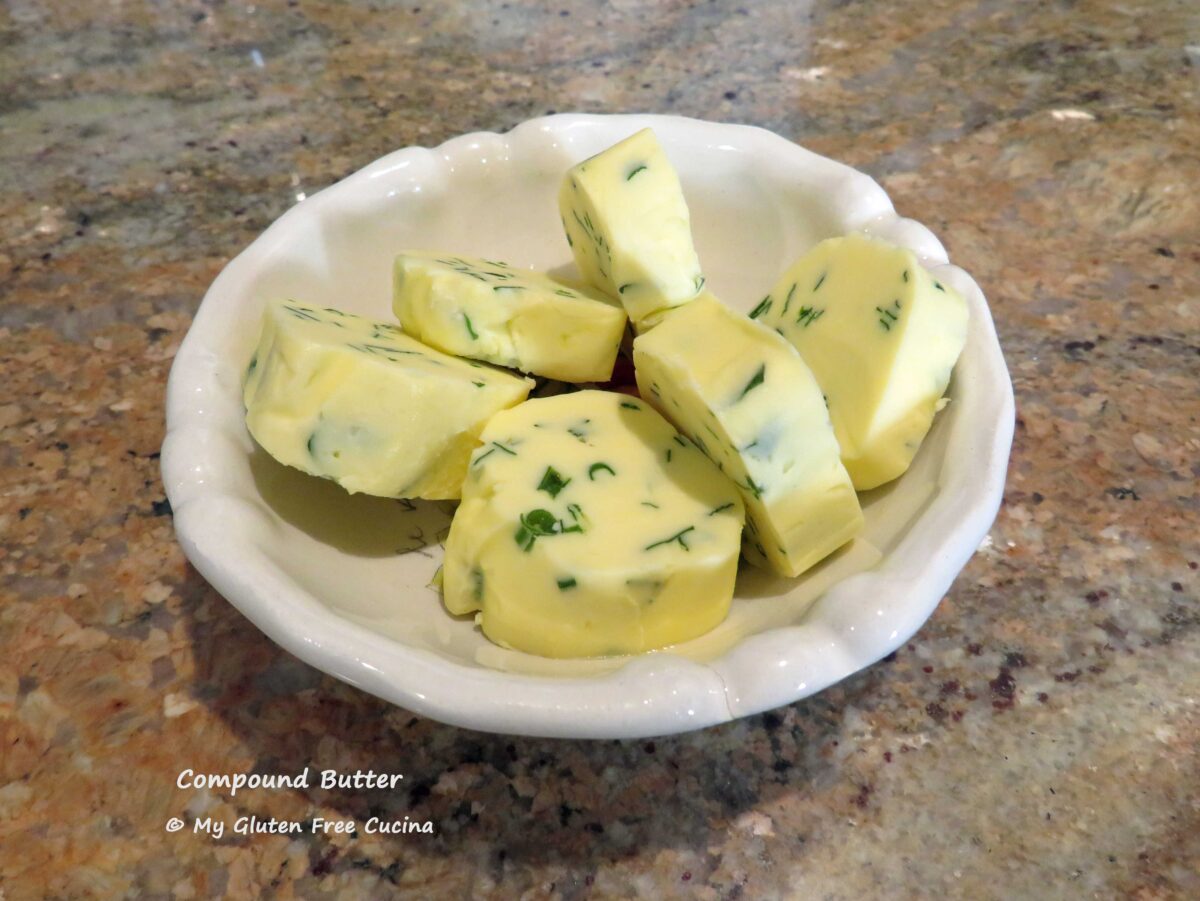
 You can refrigerate it just like this or roll the butter into a cylinder shape with parchment paper and refrigerate. When it firms up, slice it into rounds and store in an airtight container.
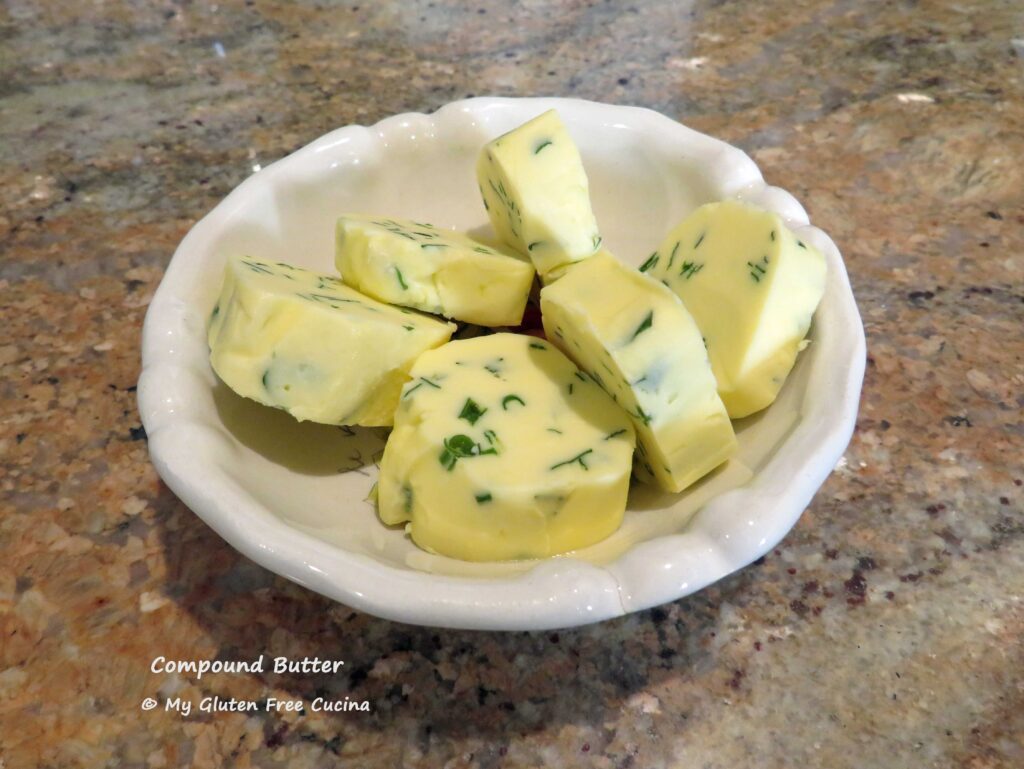
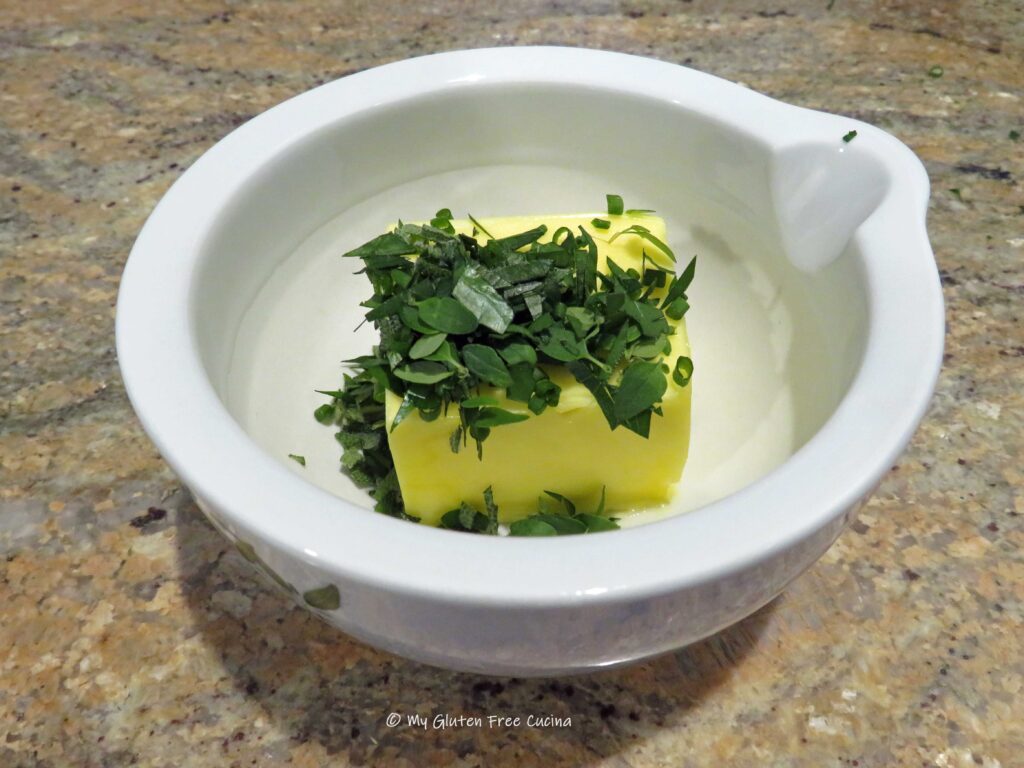
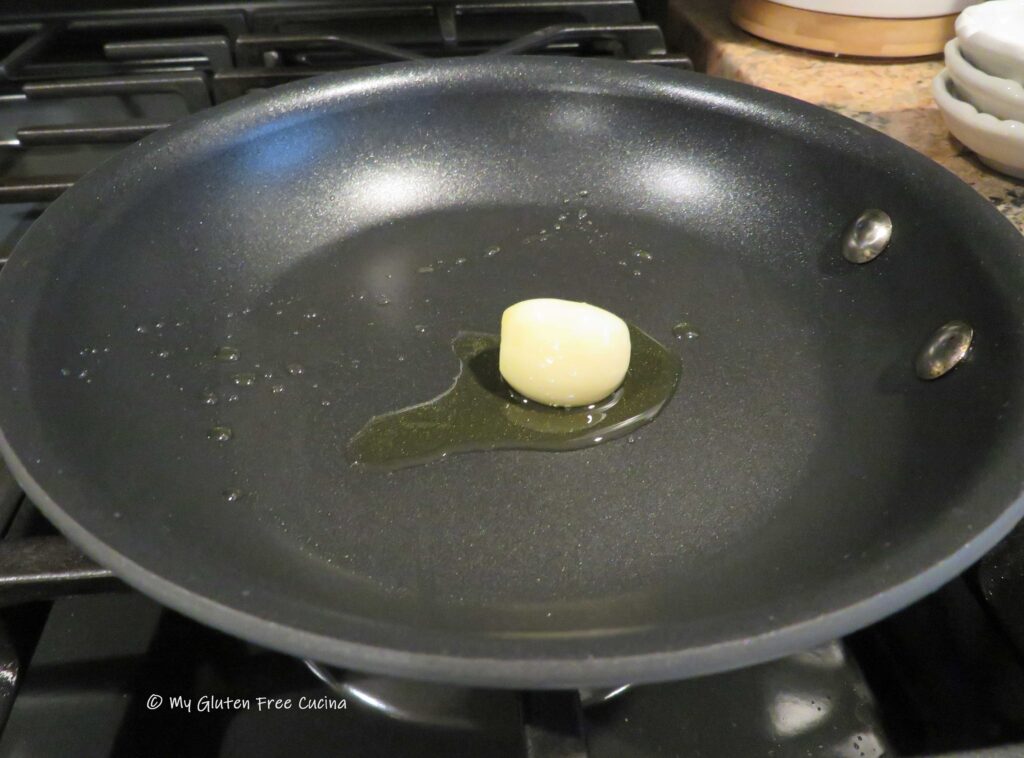 Remove the garlic and mash it with 1/2 tsp. of the olive oil. You can use a
 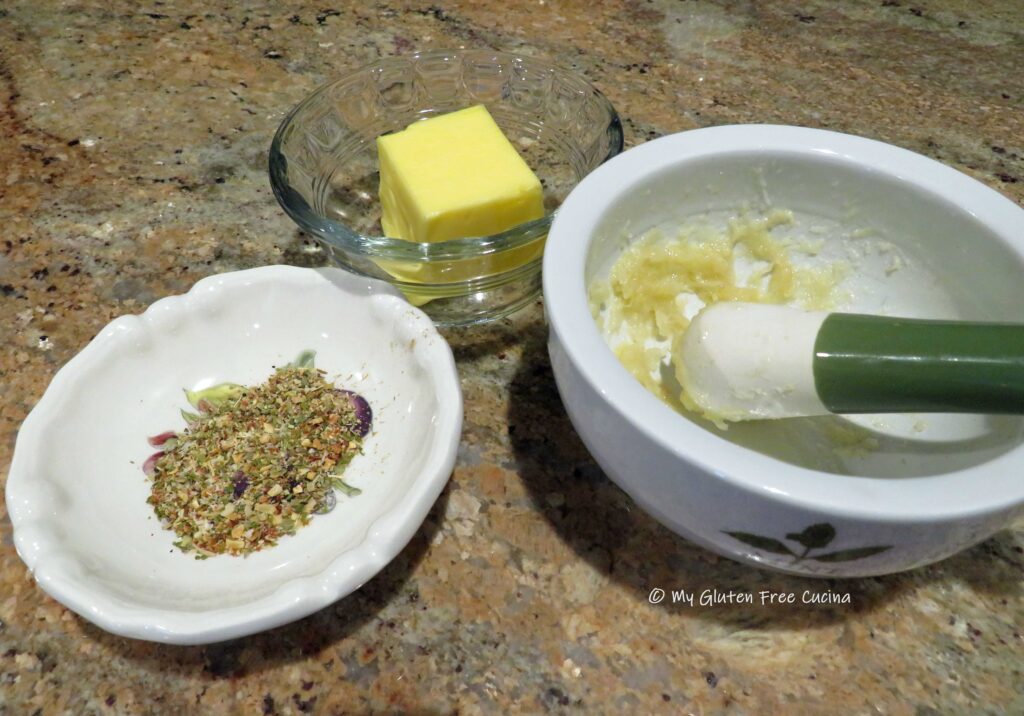 Combine the garlic mash with the softened butter and remaining ingredients. I like to use a
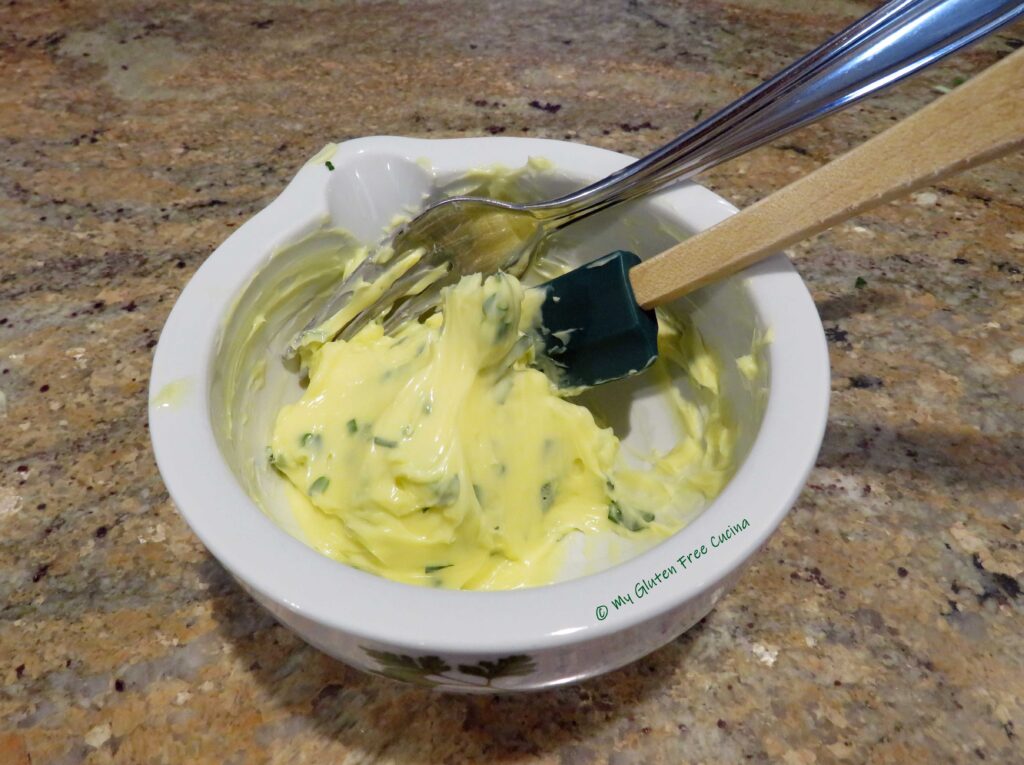
 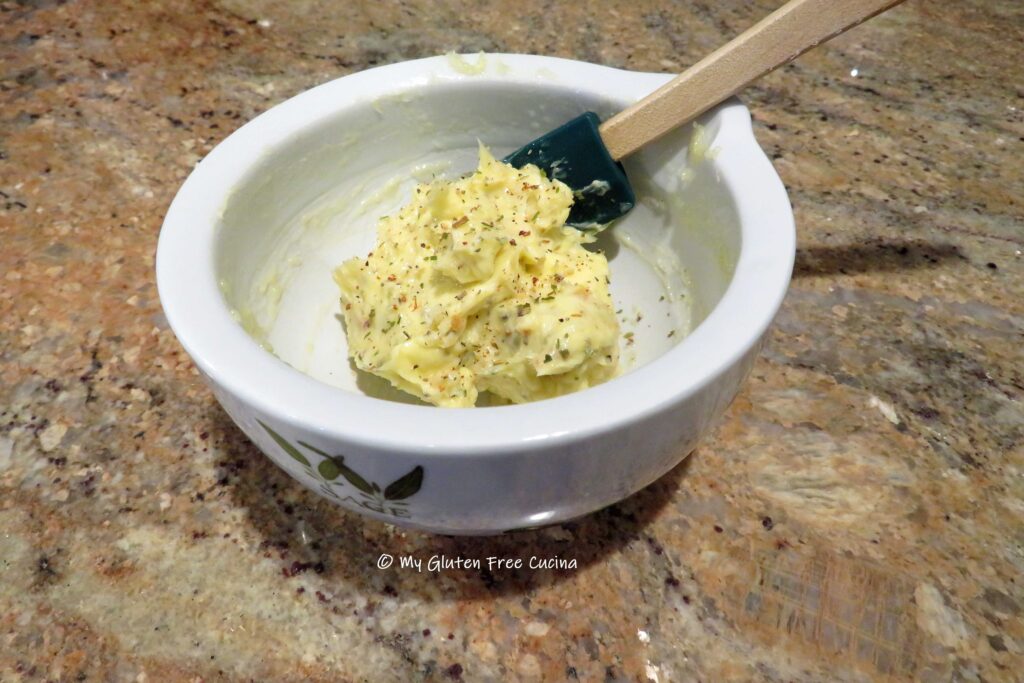 Mix well to incorporate and let it stand for several hours at room temperature, then place it in an airtight container and refrigerate (or freeze) until ready to use.
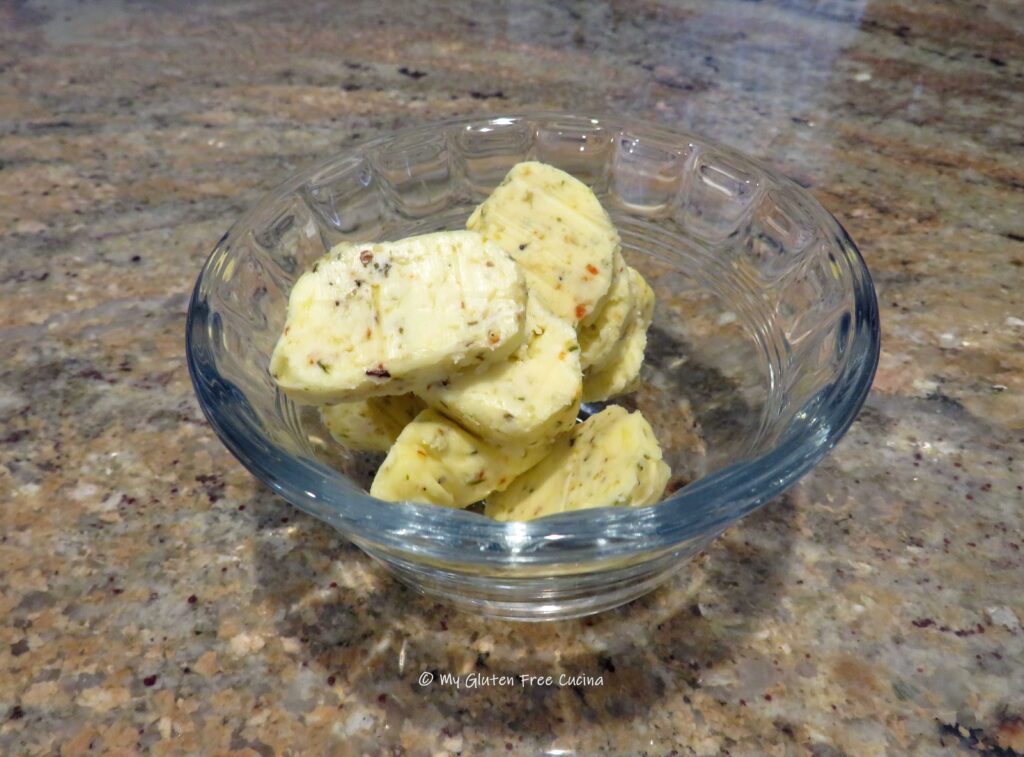 Notes ♪♫
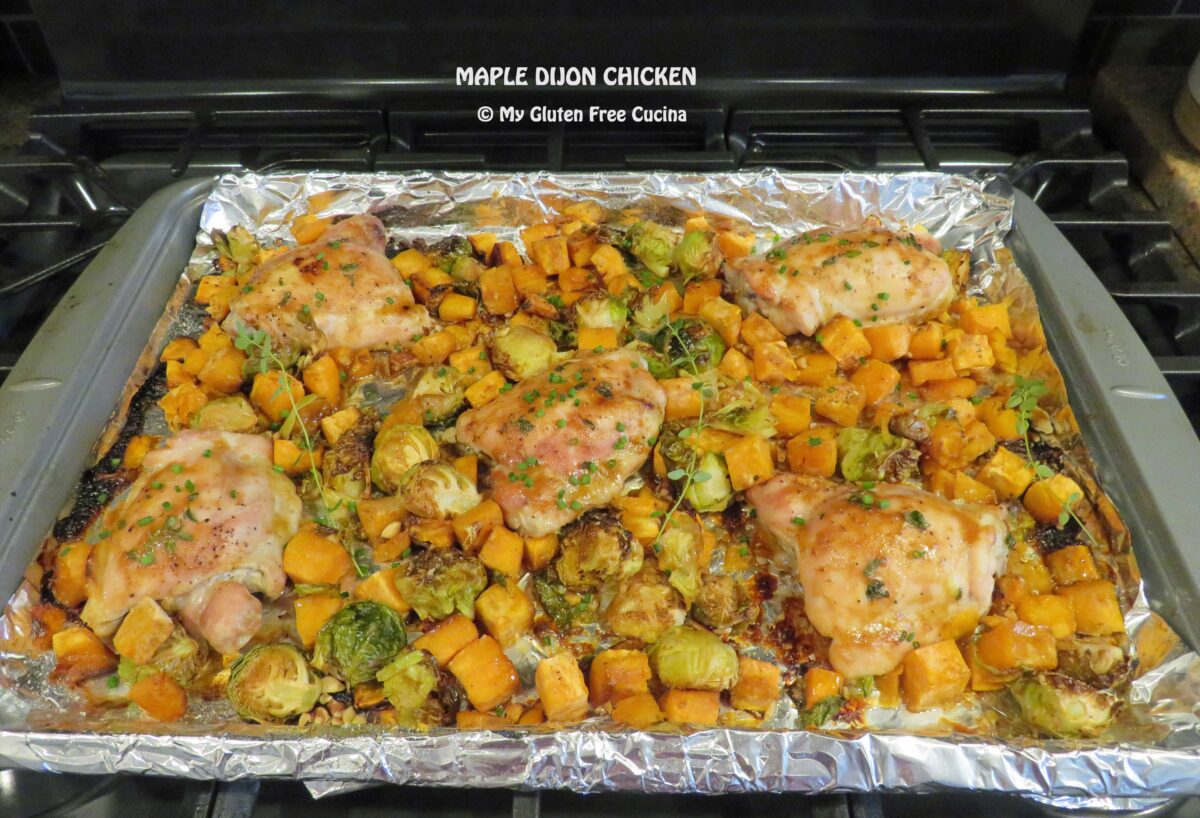

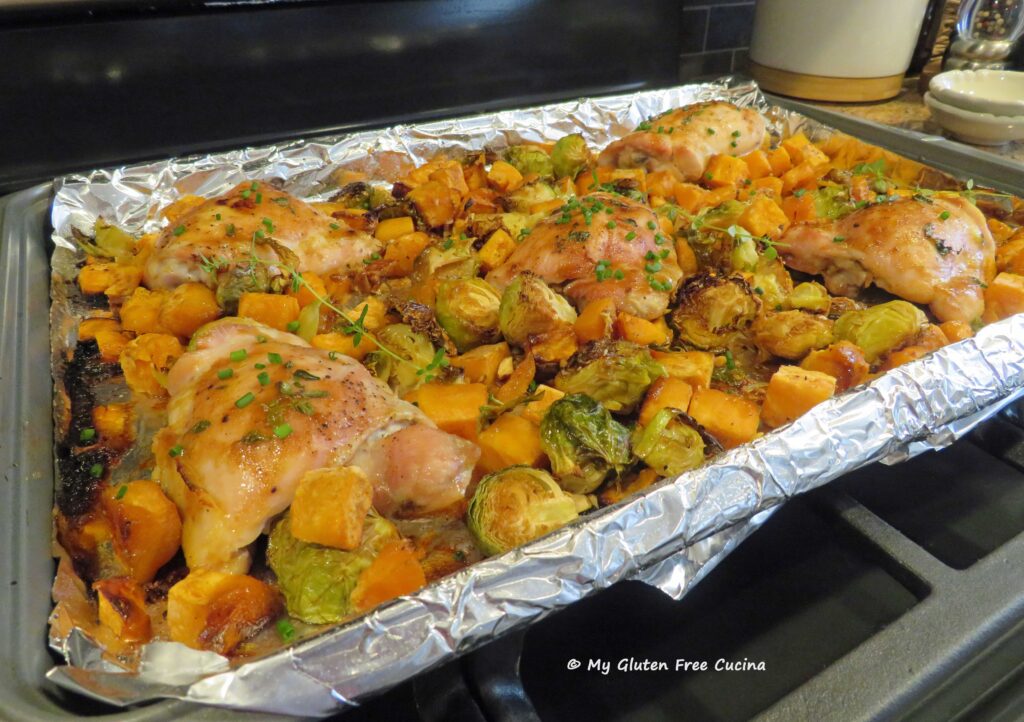
 Whisk together the Dijon mustard, maple syrup (use
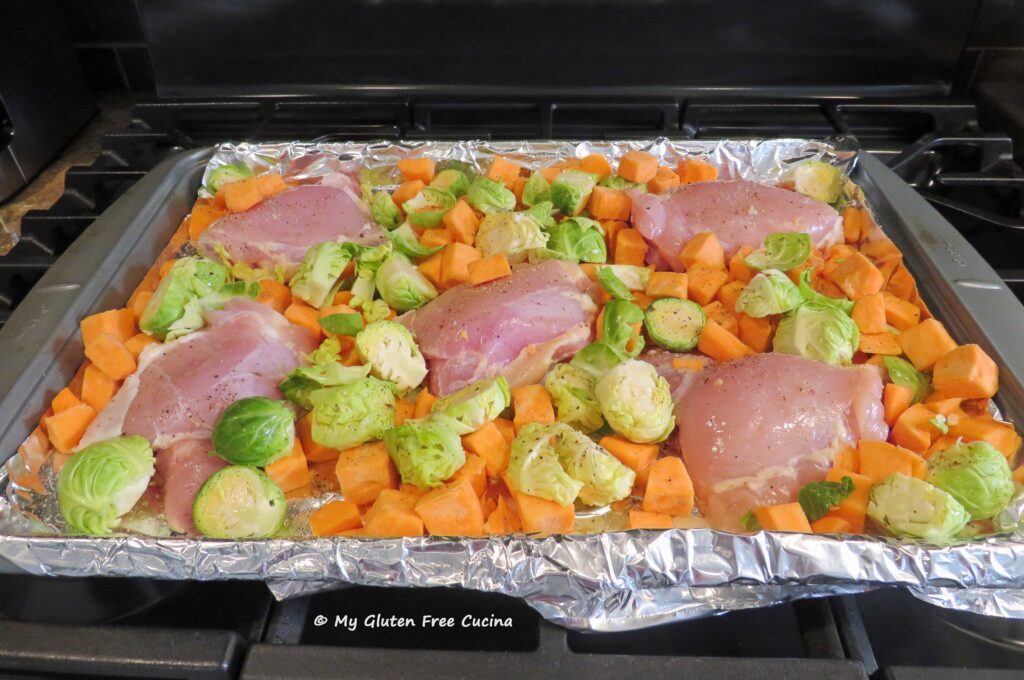
 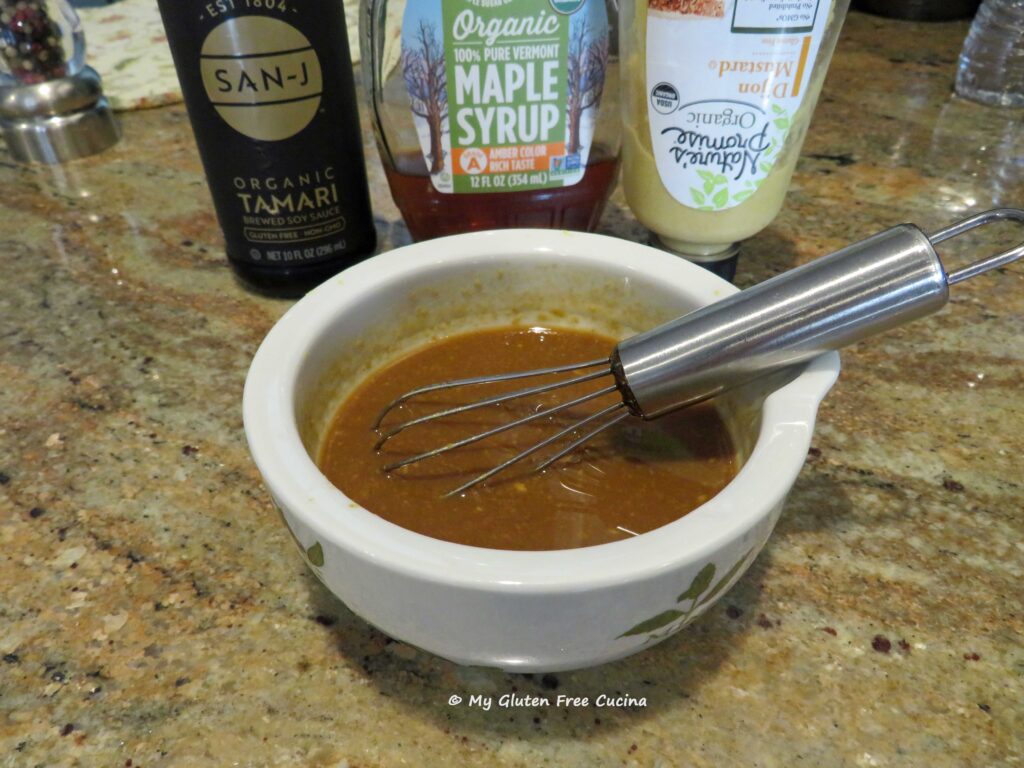 Spoon the mixture over the chicken and veggies, save a little to brush on near the end of cook time. Sprinkle fresh thyme leaves on the chicken and drizzle olive oil over everything.
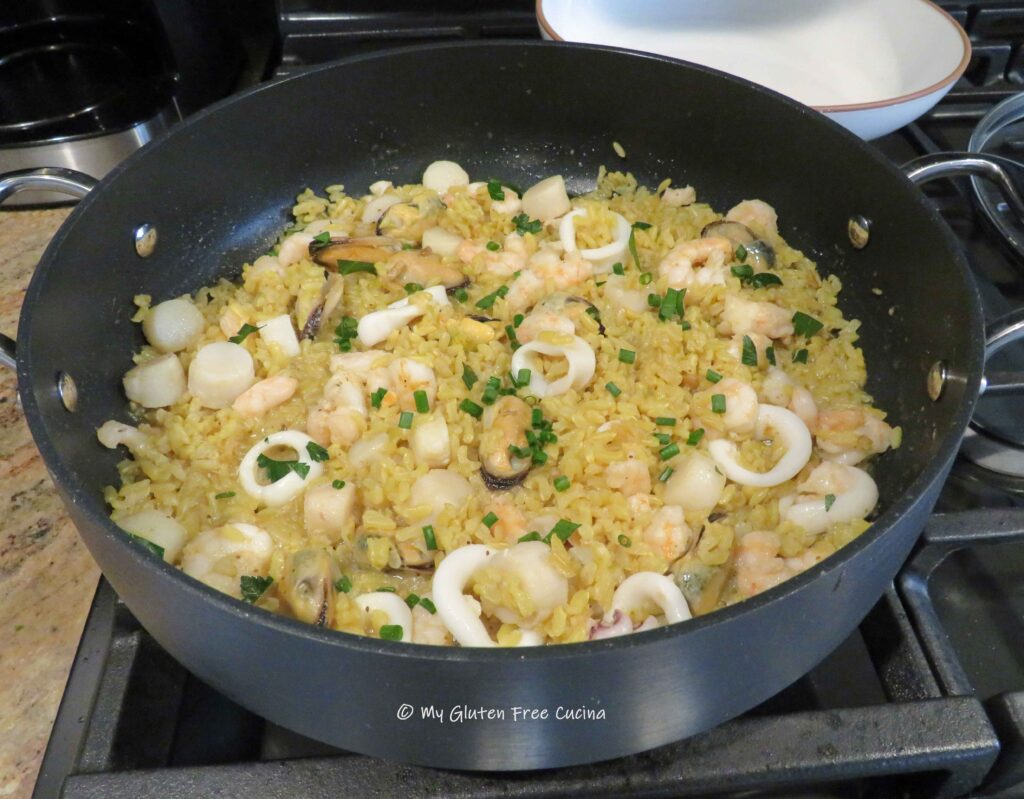
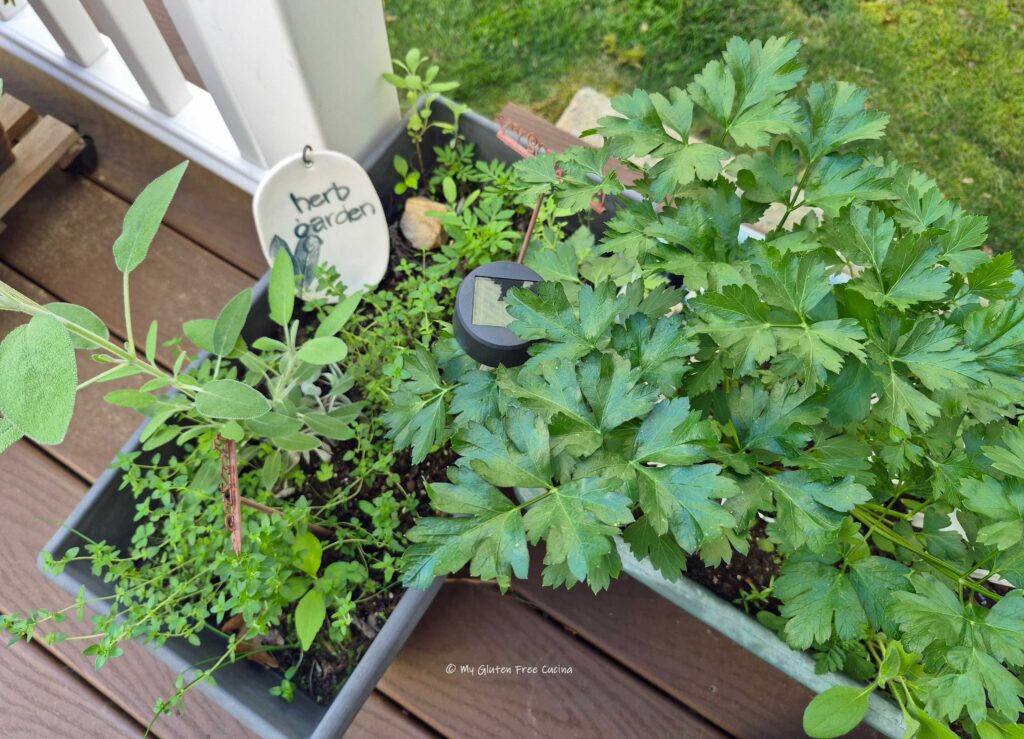
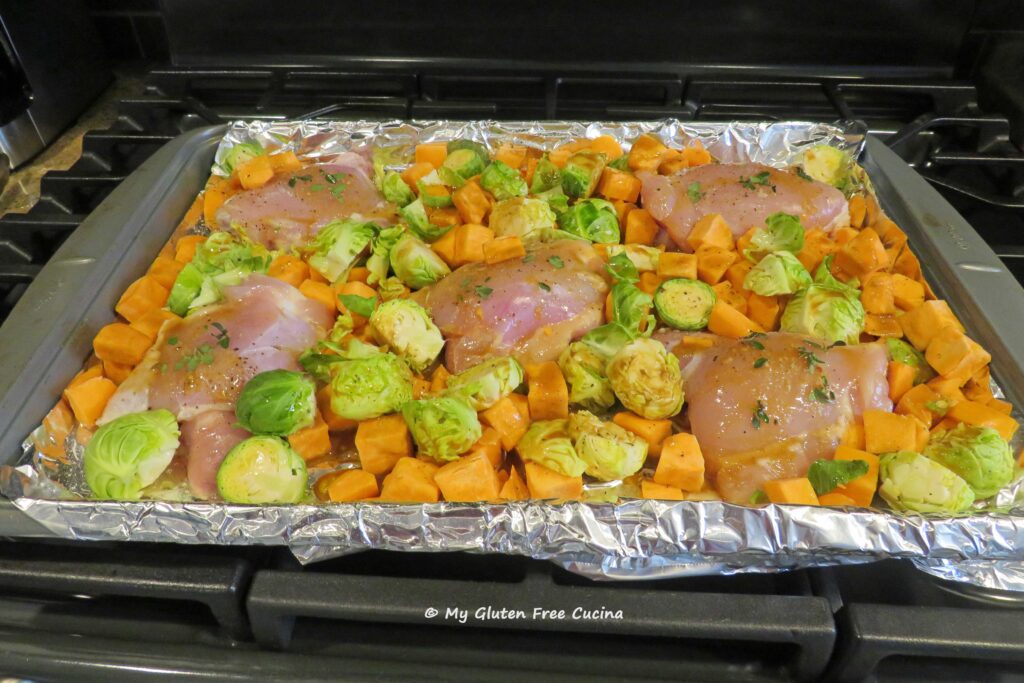 Bake for 45-50 minutes at 425º. During the last 15 minutes of baking, baste the chicken with the remaining Dijon mixture and sprinkle nuts over the veggies. Remove from the oven and garnish with fresh thyme sprigs and chives. Bring it to the table just like that, no serving dishes needed!
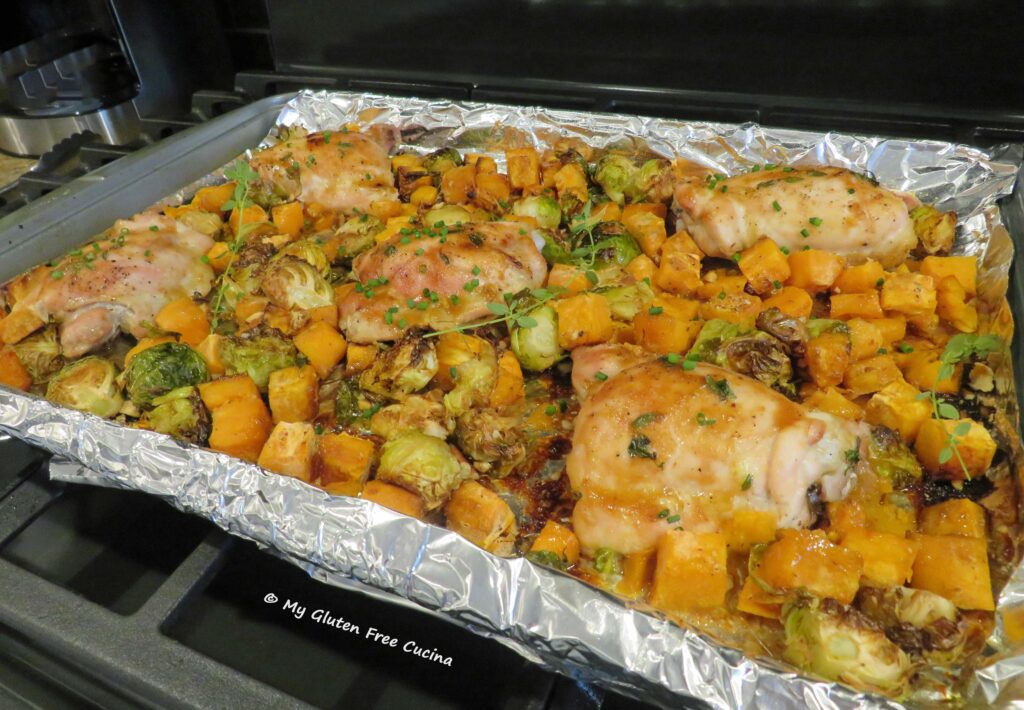
 Notes ♪♫
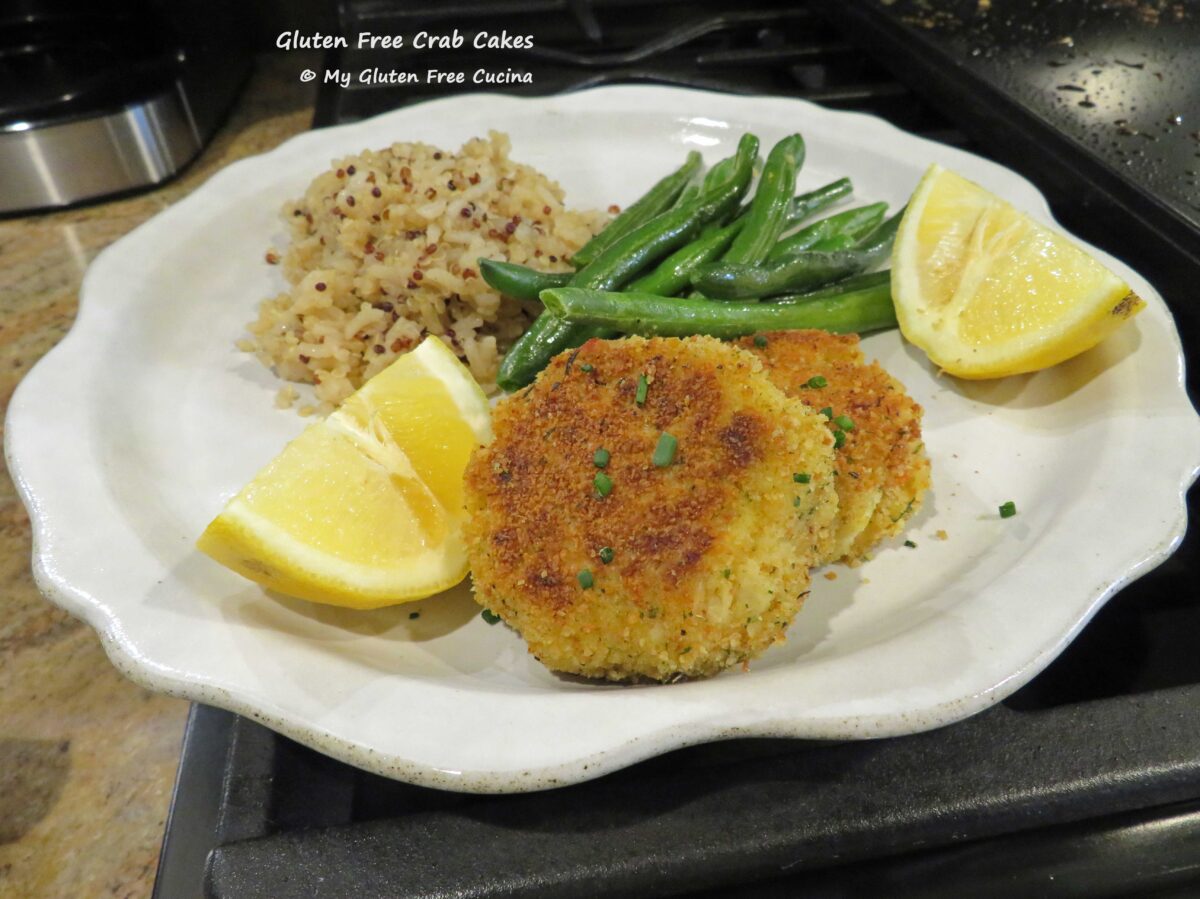
 Yield: 5-6 crab cakes (plan for 1 each as an appetizer or 2 as a main course)
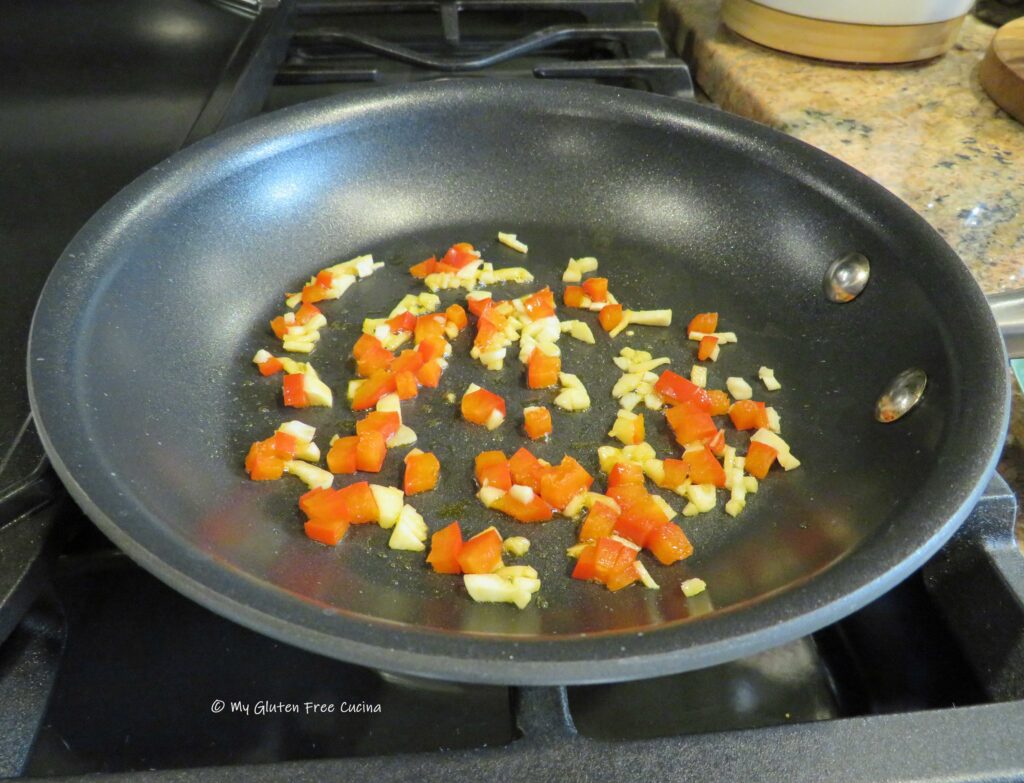 Add the breadcrumbs to a shallow bowl. In a separate bowl, whisk the egg, mayonnaise, Worcestershire sauce, minced veggies, lemon juice and seasonings in a separate bowl. Add the potato flakes and whisk until smooth.
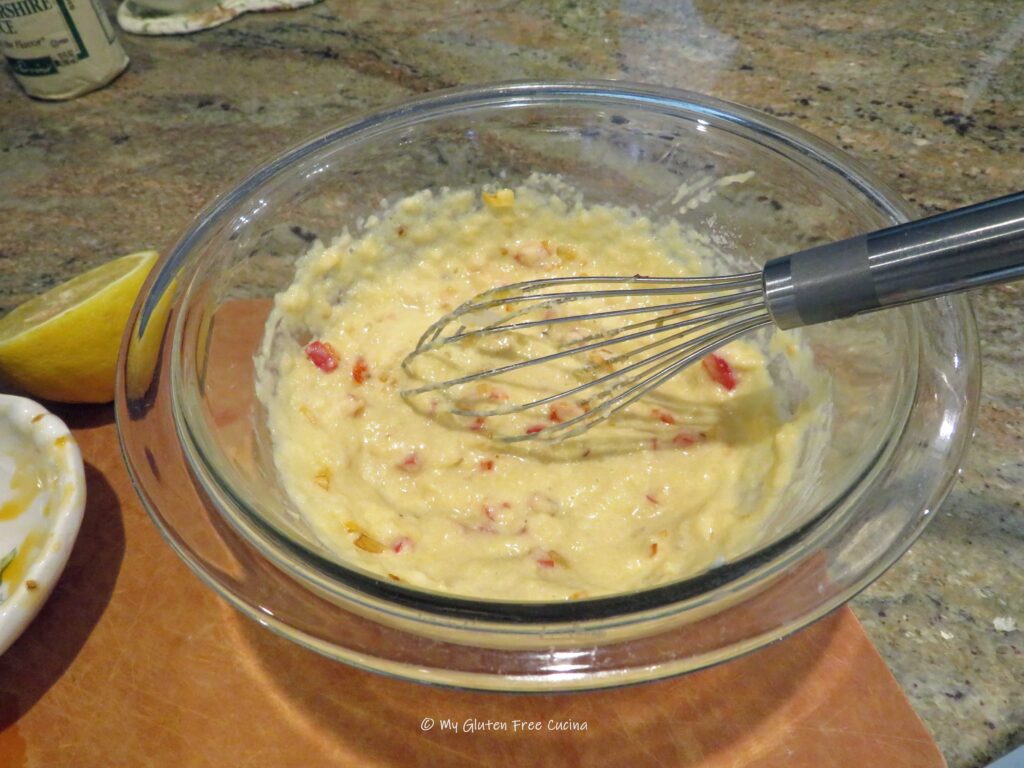 Fold in the crab meat and 2 tbsp. (half) of the breadcrumbs.
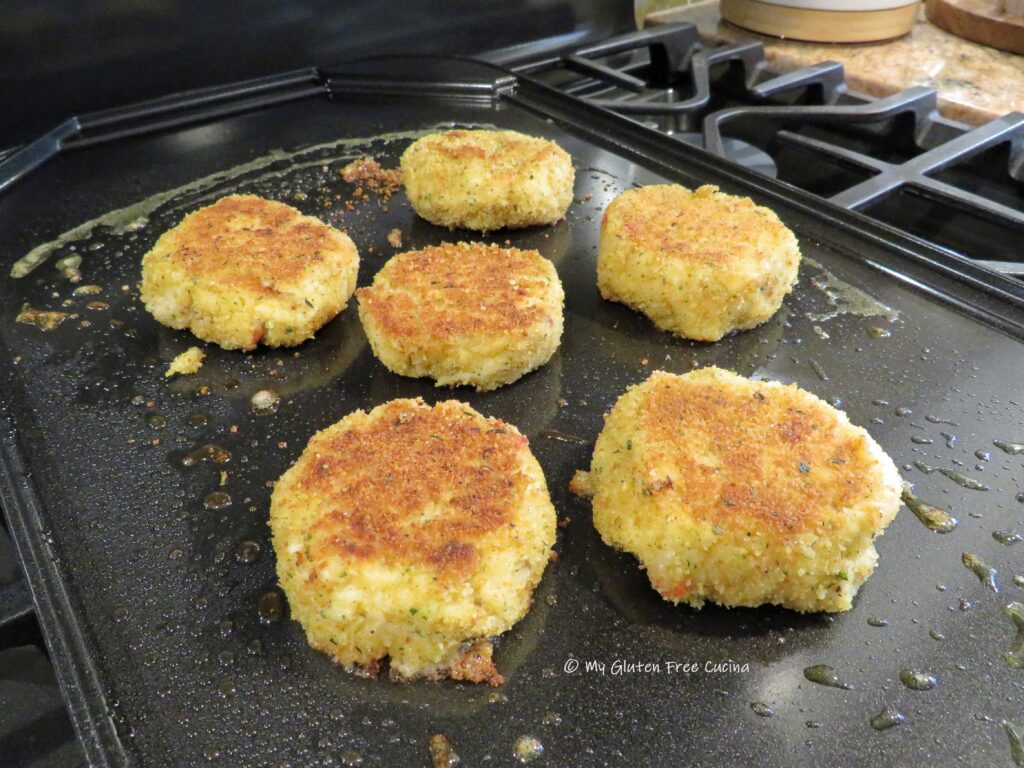
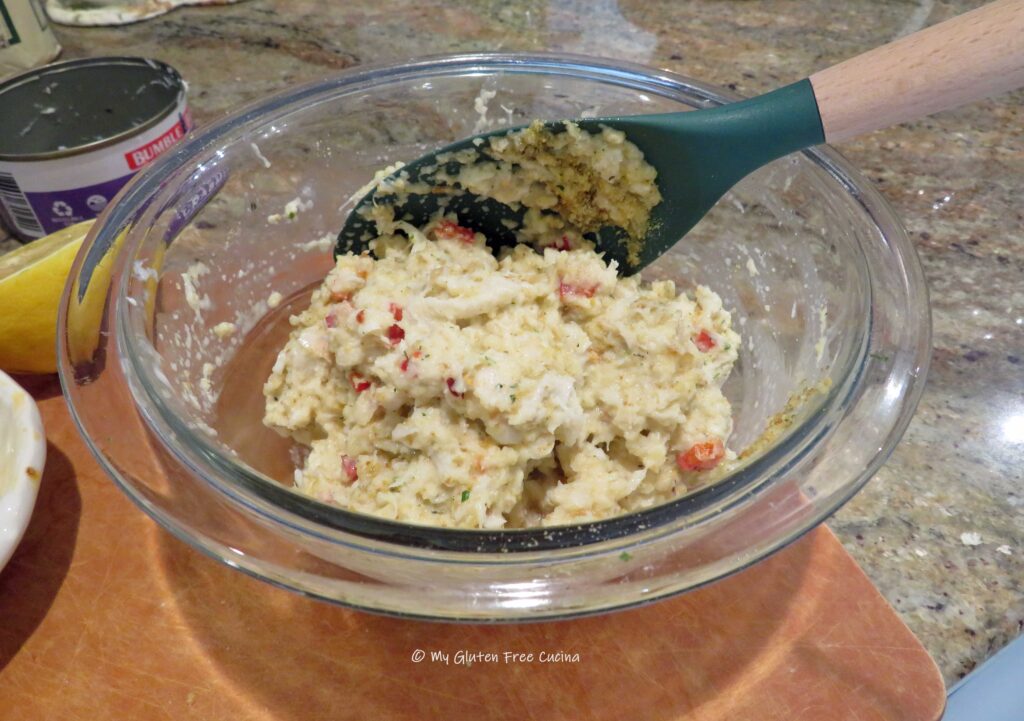 Using a ¼ cup measuring cup, scoop out the mixture to form 5-6 crab cakes. Handle them gently and they should hold together (they will be wet). Carefully roll each crab cake in the remaining breadcrumbs to coat. Arrange them on a baking sheet lined with parchment and refrigerate for 1 hour. This will help retain their shape and hold together while cooking.
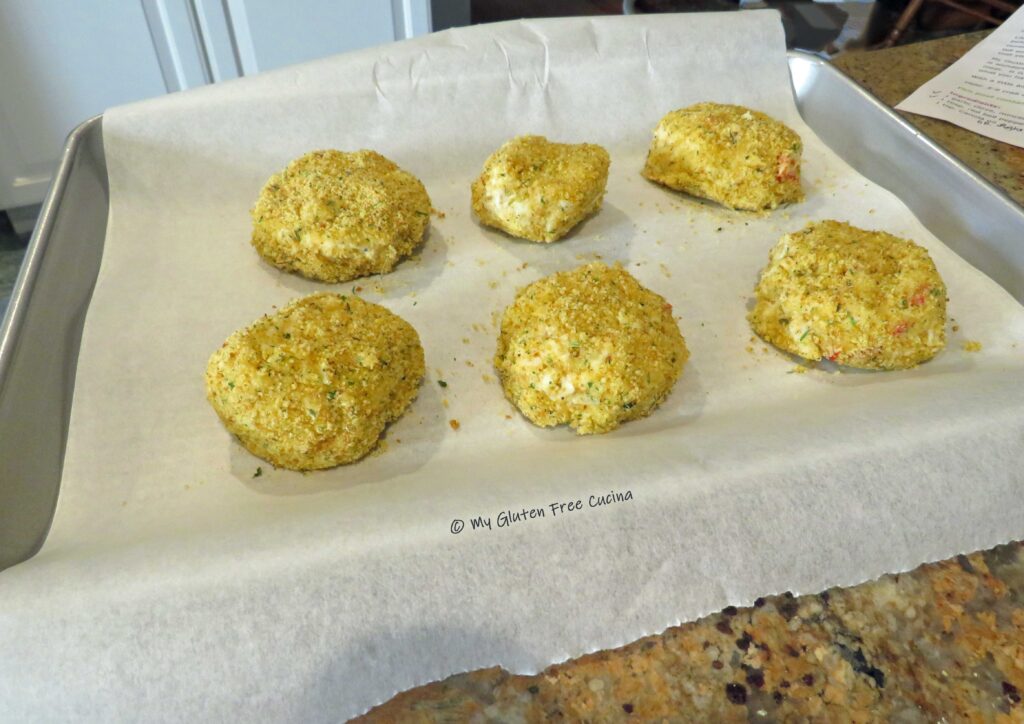 Heat a
 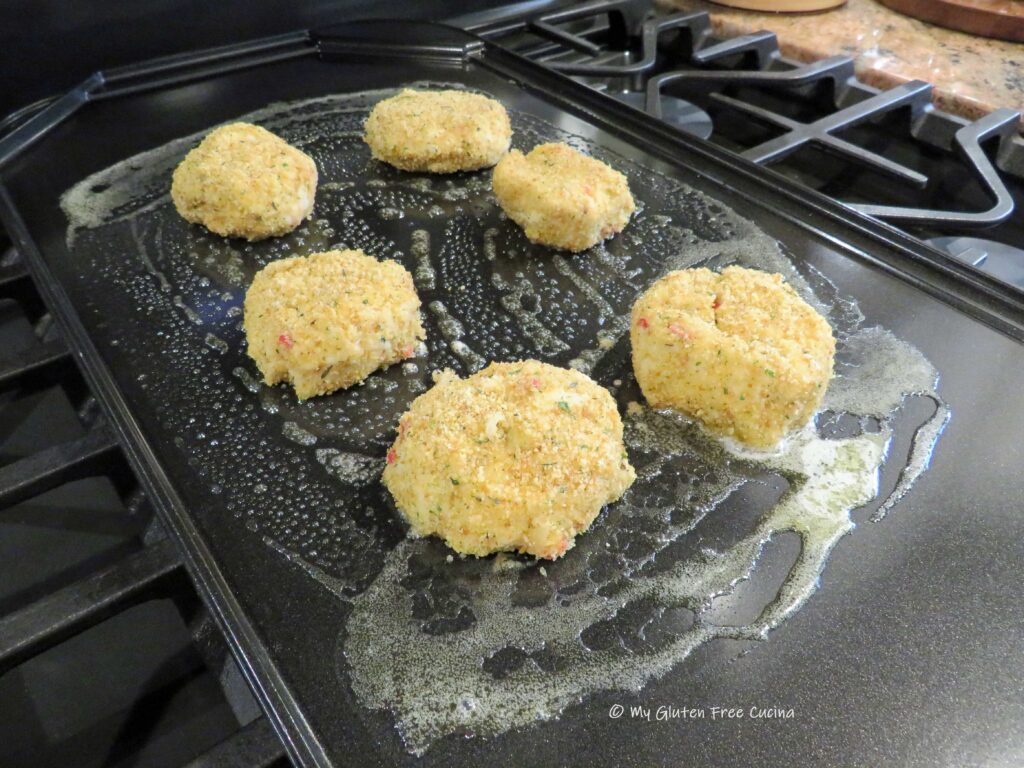 Cook the crab cakes for 5 minutes per side. To get that golden crust, don’t move the crab cakes around until it’s time to flip them over. Transfer to a baking sheet and put them in a 350º oven for a few more minutes to finish, then lower the heat and keep warm until serving.
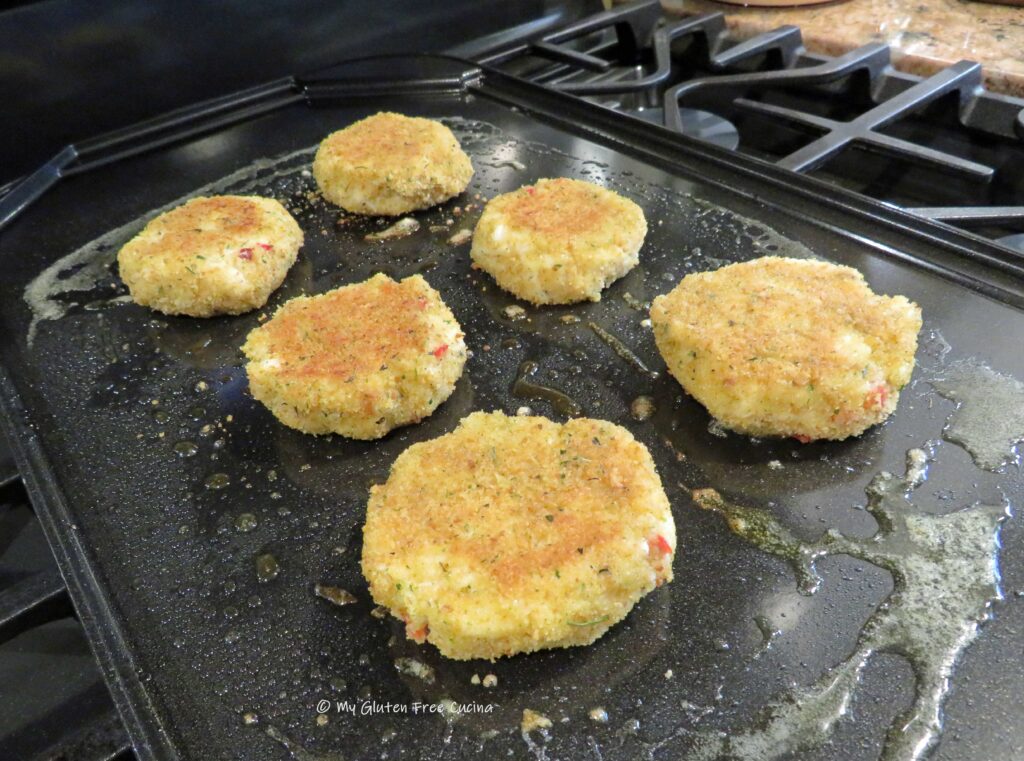 Friends, they were so delicious! The recipe is easy enough, wouldn’t you say? A lovely appetizer to begin a meal or serve as a main course. Go on and give it a try, surprise your special someone or treat yourself.
 Notes ♪♫


 Dry the beef with paper towels, this helps with browning.
 Place the beef cubes in a food safe plastic bag with 2 tbsp. rice flour and shake to coat.
 Heat 1 tbsp. olive oil in a
  Leave those caramelized brown bits in the bottom of the pan, they are full of flavor! Set the beef aside and keep warm.
 Add more olive oil to the pan with the onion, carrot, celery and garlic. Cook for several minutes, stirring frequently, then clear a space in the center for the tomato paste.
 Toast the tomato paste for a minute, then stir it into the vegetables. Add the wine, using a spatula to scrape up those browned bits at the bottom of the pan. Reduce heat to a simmer and continue cooking until the wine is reduced by half.
 Stir in the beef broth and crushed tomatoes, cover and simmer on lowest heat for 2-½ hours.
 Stir the sauce frequently to be sure it isn’t sticking to the bottom of the pan. A
  A sauce like this deserves an extra special pasta. Check out these Gluten Free Paccheri Rigati – OMG what a find! I got them from
 Variations:

 Mist a
 Cook the bacon, drain on paper towels and cut into small dice. Cover and set aside.


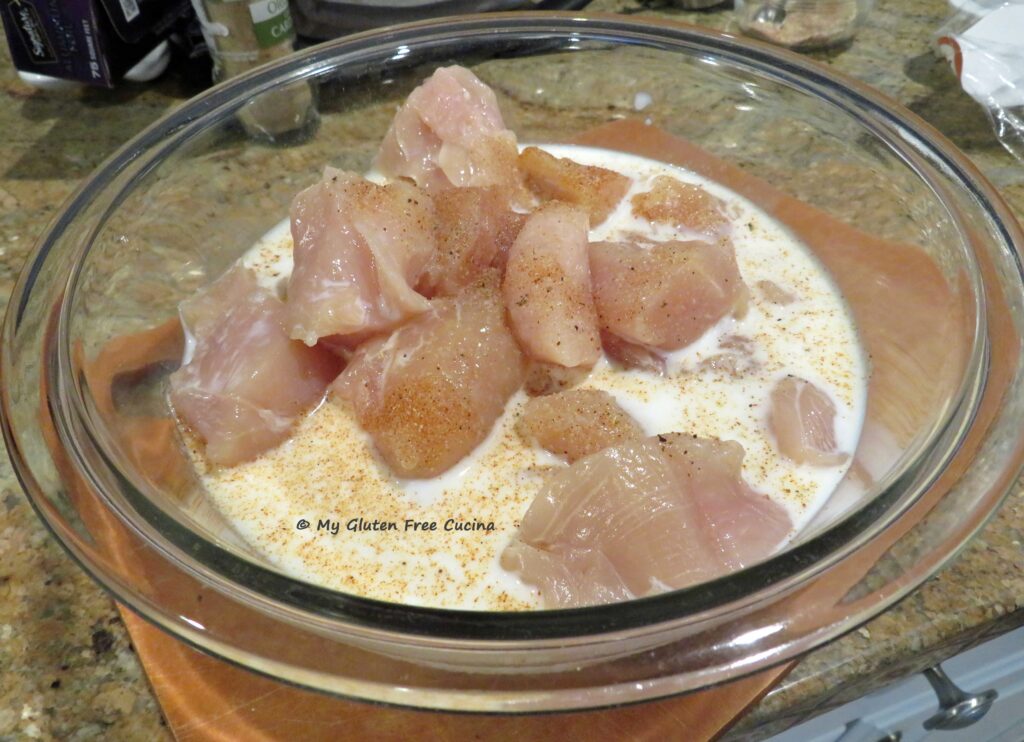 The next morning, heat the canola oil in a deep skillet. Add the cornstarch and the rest of the seasoning mixture to a small bowl. When oil is very hot, use tongs to pick up one piece of chicken at a time and dredge in the cornstarch, shaking off the excess. Add to the hot oil and cook until browned on both sides and the internal temperature reaches 165º. If you’re not sure, use a thermometer.
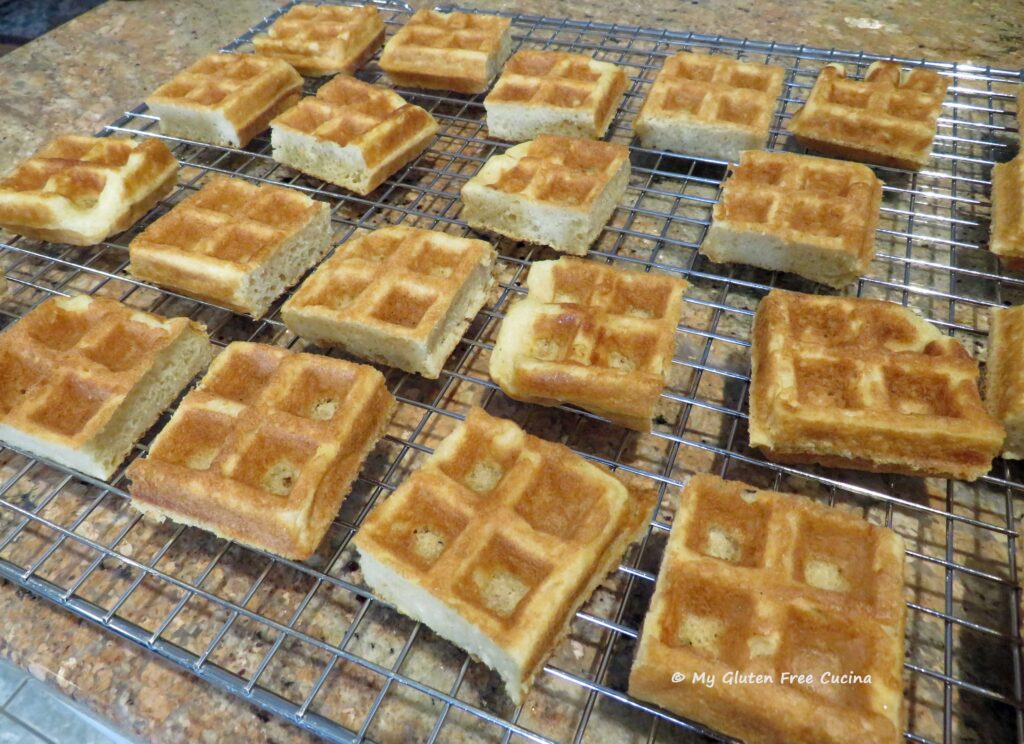
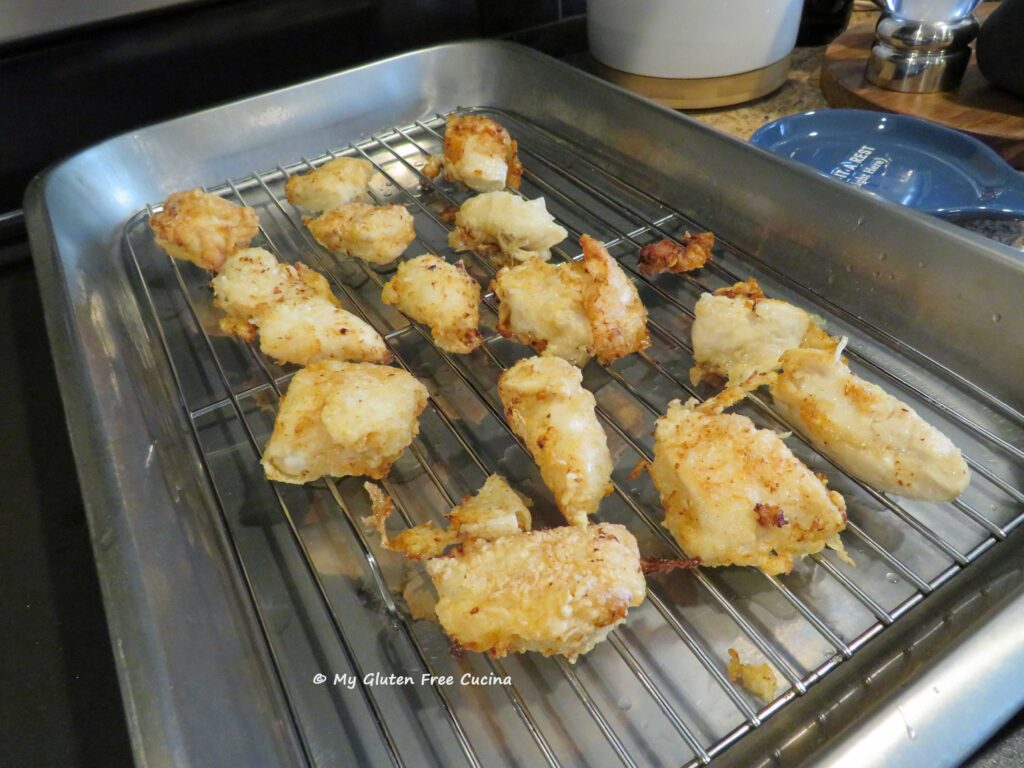 To assemble, arrange the waffles on a serving dish in a single layer (if you made them the night before, pop them into the microwave for 1 minute to reheat). Top each waffle section with a piece of chicken and secure with a skewer or toothpick.
 Wow, these little skewers were so tasty! The recipe was a bit of extra work, but I think everyone enjoyed them along with my usual brunch offerings. As I said before, it was all about trying something different. And would you believe, I myself had never had Chicken and Waffles before?
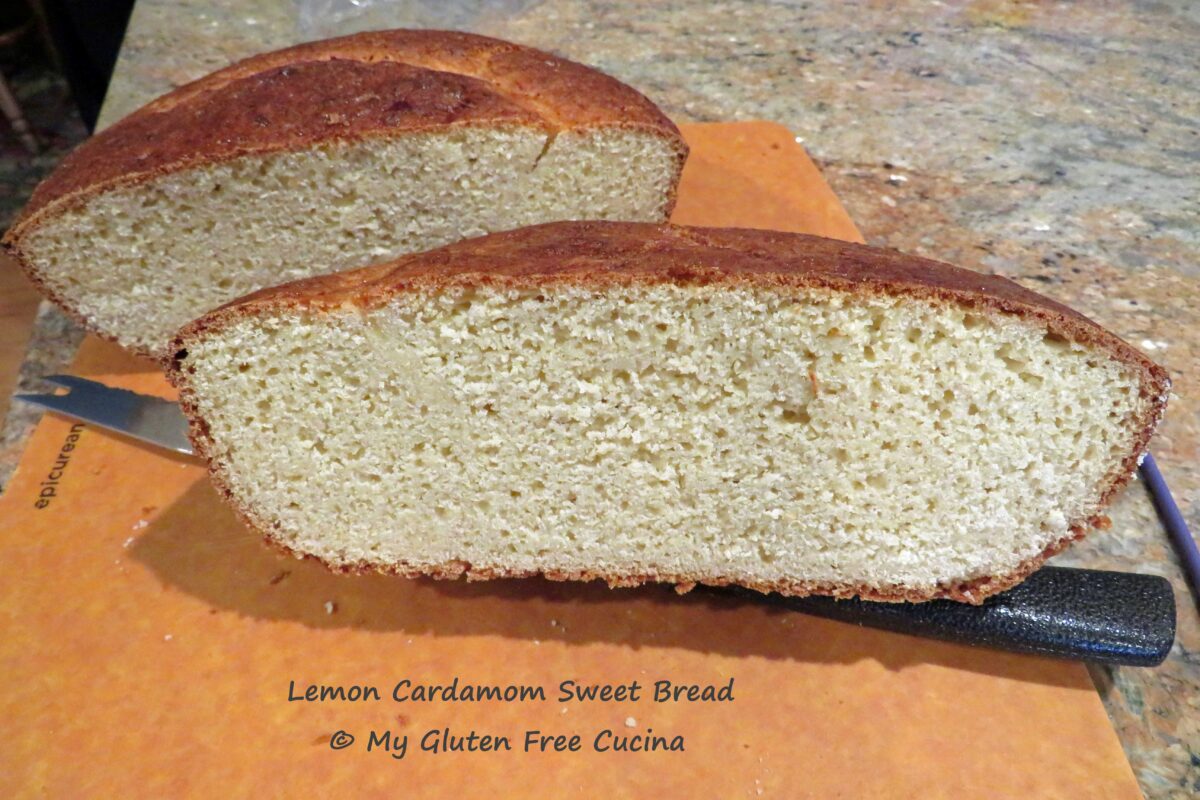

 Cover the bowl with oiled plastic wrap and let the dough rise for 30 minutes while you preheat the oven to 375º.
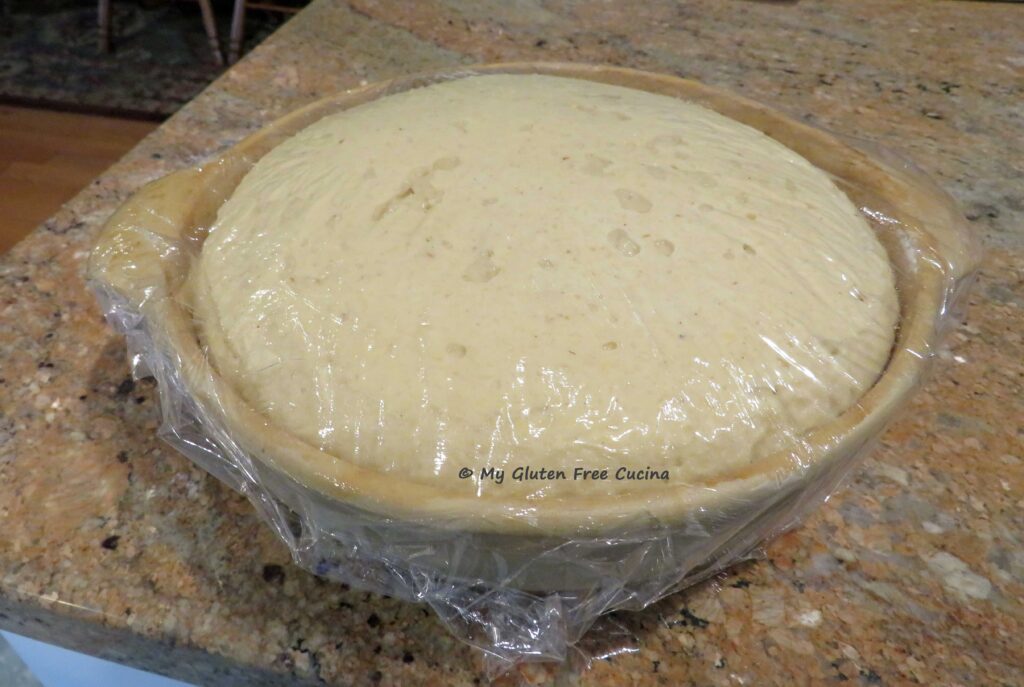 Just before baking, whisk together one egg with 1 tbsp. water or milk. Brush over the entire loaf and score the top (reserve the leftover egg for breakfast).
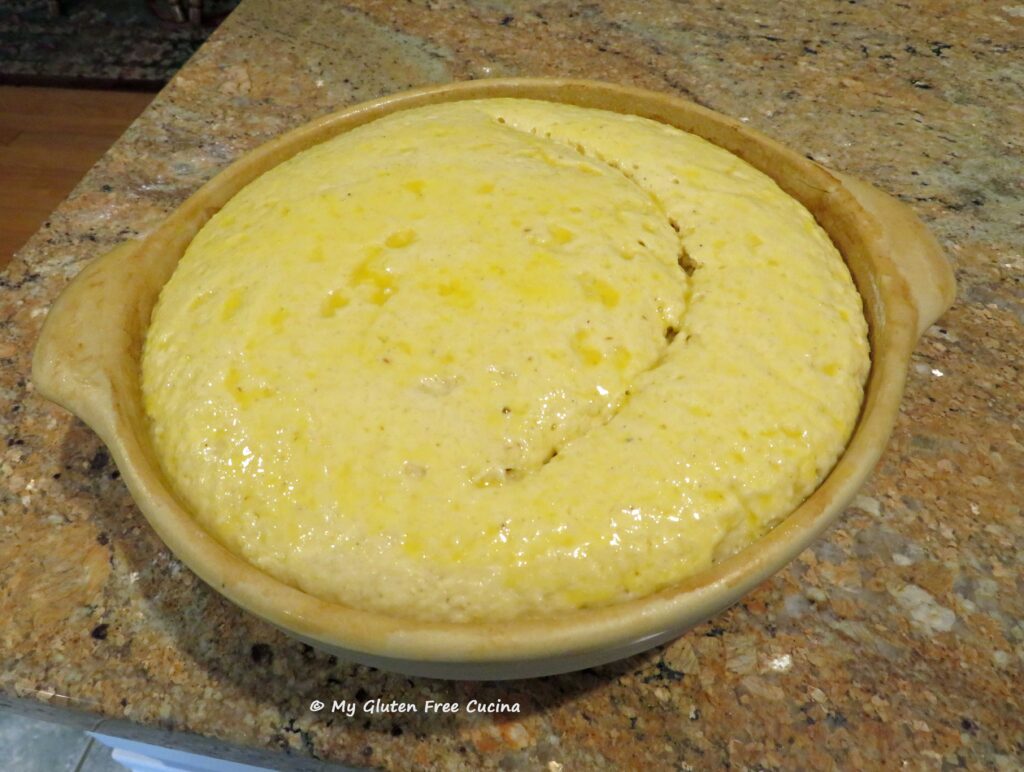 Bake on the middle rack for 40-45 minutes, or until the internal temperature reaches 195-200º (use a
 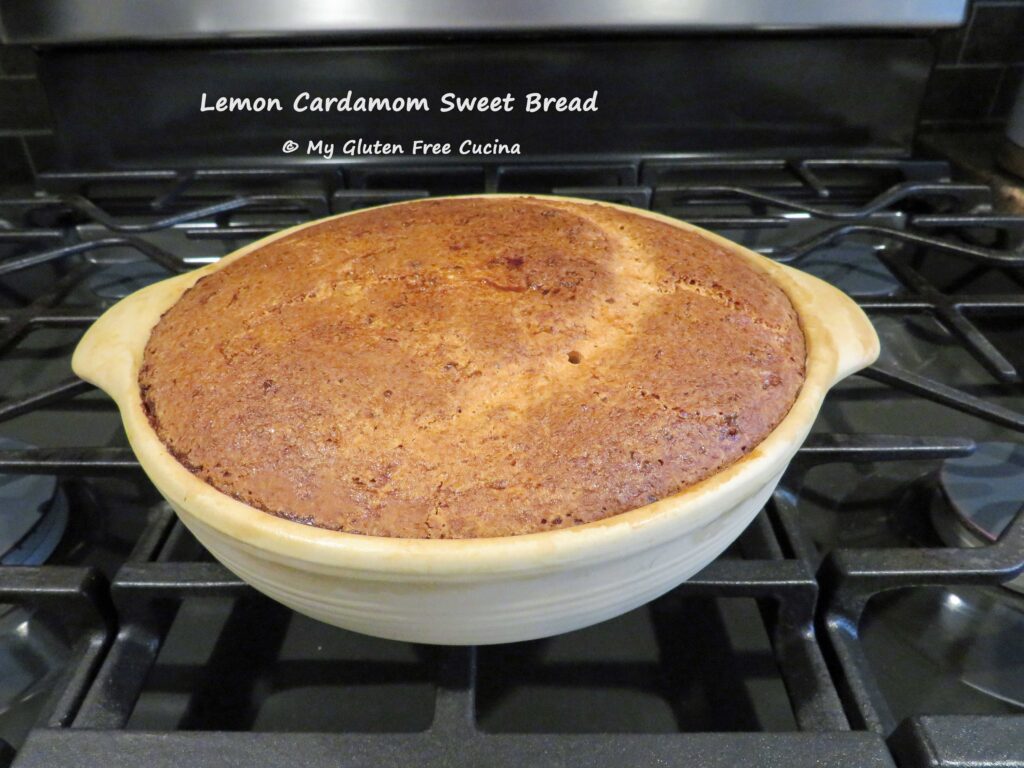 Cool in the pan for 10 minutes then transfer to a rack. You may need to run a knife around the edges.
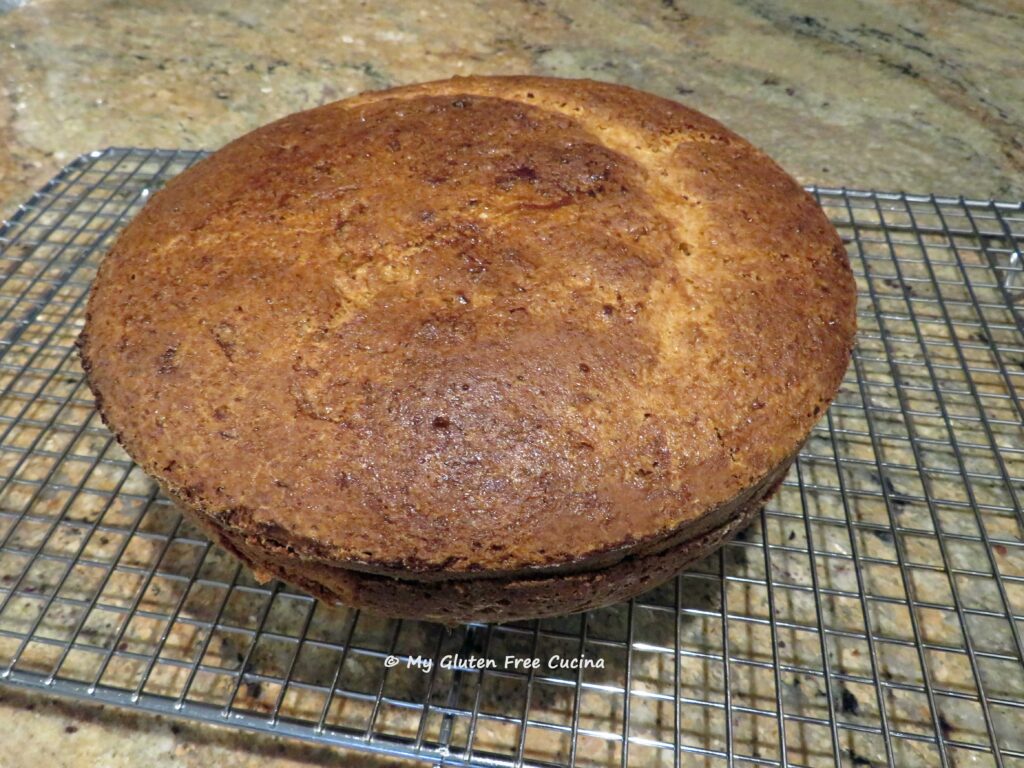 Let the loaf cool for at least 6 hours before slicing. Letting it rest overnight is even better, store in a bread bag once it has completely cooled.